LEARNING TO SNORKEL IN KONA HAWAII
Snorkeling is one of the most wholesome and rewarding water activities in Hawaii. Hawaii Island or Big Island has some of the best reefs in all of Hawaii. Snorkeling allows you to observe the beauty beneath the water with very little experience and limited equipment. Here at Dolphin Discoveries, we provide proper fitting and snorkeling instruction for thousands of visitors every year. We’d like to share our experience with you so that you get the most out of your snorkeling adventure. With a little practice and this guide, you’ll be snorkeling in no time.
How to get started.
Before you rush out into the deep blue there are some fundamentals that everyone should learn before their first snorkeling adventure. First, knowing how to swim is paramount. You’ll also want to get your equipment properly fitted. You should have a basic understanding of how to read ocean conditions. You’ll want to practice, practice, practice before you head out. Finally, you’ll want to plan out your first snorkeling adventure to maximize your time and enjoyment.
You don’t need to be an expert swimmer, but you should be able to tread water and be able to move about unassisted. Snorkelers with limited swimming and snorkeling experience should always wear a Personal Floating Device (PFD). As you get more comfortable in the water, you can use a pool noodle or inflatable vest designed for snorkeling. These floatation devices will keep you a float and make you visible to others in the water. Additionally, if you are snorkeling outside of a swim zone, an area that is not specifically designated for snorkeling, you’ll need to display a dive flag. This is a requirement by the United States Coast Guard and these flags notify boats not to come within 100 feet of your location making wake.
Next, you’ll want to get your gear properly fitted. At a minimum, you’ll need a snorkeling mask, a snorkel, and fins. There are a ton of options out there. Snorkeling sets start at $50.00 and go up to over $500.00. Before you drop some serious coin, try renting a few times to make sure snorkeling is right for you. We often see new snorkelers who buy their equipment online, which doesn’t allow them to purchase proper fitting equipment. This usually leads to frustration and disappointment due to poor quality and improper fit.
There are numerous snorkeling gear rental companies on the island. Their gear is one size fits most and is a great way to start out and not have to spend too much. These rental companies will ensure that you have a proper fit. If you find that you love snorkeling, go to a dive shop near you and have them fit you with the proper gear. A good quality snorkeling set can last you years with proper care.
Masks come in all shapes and sizes. You’ll want one that fits snug to your face and creates a seal so that no water gets in. The mask should not be so tight that you experience pain or discomfort. Your snorkel should fit comfortably in your mouth and your lips should be what keeps the snorkel in your mouth, not your teeth. Lastly, you’ll want fins designed for snorkeling. These fins are a one-piece unit that slips over your foot. Fins should not be loose and should be snug enough that they don’t slip off, but not so tight that they create discomfort or cut off circulation. Fins that are too loose will cause blisters.
You’ll also want some sort of sun protection. We highly recommend UV coverups such as rash guards, dive skins, or other UV protection. For those areas that your clothing does not cover, we recommend reef safe sunscreen. Sunscreens made out of minerals are your best bet. Use a drop of baby shampoo to defog your mask. Rub the inside of the mask lens with the shampoo, then rinse with fresh water. Lastly, underwater cameras are always fun, remember to only take memories and photos while you’re at the reef.
You won’t see any fish on your first snorkel!
Your first snorkeling adventure shouldn’t be in the ocean. A swimming pool with a shallow and deep end is ideal. Practice wearing your mask in the shallow end. Just put your face in the water, you don’t need the snorkel or fins. Make sure your mask doesn’t leak. Play around and adjust your mask until it no longer leaks.
Once your mask is set, put your snorkel on your mask. It goes on the left side of your face. Again, just stand in the shallows, put your face in the water and practice breathing through your snorkel. Once you’re comfortable, swim side to side of the pool remaining in the shallows. If you’re mask leaks, keep adjusting the strap and mask position, remember don’t over tighten the mask. This will lead to leaks.
Now that your mask fits perfectly and you are comfortable using the snorkel, put your fins on in the shallow end of the pool. Grab the edge of the pool, place your face in the water, lay horizonal and start moving your legs alternatively up and down. Your legs should be mostly straight. The fins are designed make you move through the water with less effort. First time snorkelers often complain that the fins feel weird. This is because most fins are designed to float and provide a small amount of lift on the snorkeler’s feet. Once you are comfortable with fins, let go of the wall and swim back and forth in the shallows until you can swim for five minutes without putting your feet down.
Your last test before you head out into the deep blue is to head to the deep end of the pool. You’ll want to practice taking your mask and fins on and off while treading water. Remember, you never want to stand on coral reef, you’ll damage the reef by crushing the small animals that make up the reef. Having the skill to tread water and remaining flat on the surface is critical to being a responsible snorkeler. Now you are ready to start planning your first snorkeling adventure.
Understanding the Ocean
The ocean can be a magical and enjoyable place, but it can also be very dangerous at times. Ocean conditions can change quickly and understanding what is safe and not safe can be the difference between amazing and frightening. There’s a saying for all ocean activities “when in doubt, don’t go out”. One easy way to determine if conditions are safe is to ask a lifeguard. Lifeguards often set flags on the beach to tell you when ocean conditions are not safe. If there is no lifeguard at your snorkeling destination, stop and observe the ocean. Is the ocean calm or are there waves crashing on the beach? Is it windy, do you see waves with white caps on them? Are there are other snorkelers in the water? High winds and large waves are clues that you should pick another snorkel spot or a different day. If lightening is present, quickly exit the water and move to a safe spot.
There are other hazards that aren’t so apparent. Rip currents can quickly wash you out to sea. When you’re in a rip current, stay calm and don’t try to fight the current, let it push you out. Once the current has stop pushing you, swim parallel to the land until there is no current, then swim back to shore. Brown water, or water that is contaminated by pollutants also poses hazards to snorkelers. There are other marine creatures besides sharks that can be dangerous to snorkelers. Jellyfish, sea urchins, and the coral itself can often cause a great deal of pain for the unsuspecting snorkeler. Being aware of ocean conditions is the difference between an epic good time and a disaster.
Location, Location, Location.
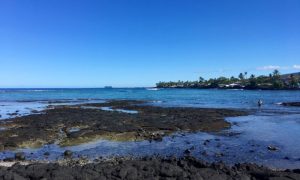
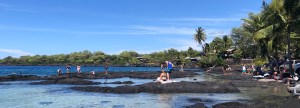
Now that you’ve mastered your basic snorkeling skills it’s time to pick the perfect spot for your first snorkel. You’ll want a place that has easy entry and exiting. Also, a place that has a lifeguard and places you can standup without damaging the coral reef. We recommend Kahalu’u Beach Park in Kona. There’s usually a lifeguard on duty and the reef is shallow. There are sandy spots between the reefs that you can stand on in case of emergency. However, you should try your best never to stand and stay flat on the surface to prevent kicking any of the reef.

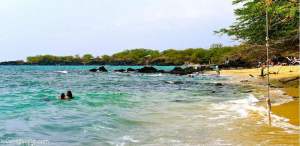
Beach 69 near Waikoloa is another great entry level snorkeling destination. This reef has an easy sandy entrance and the reef is generally too deep for snorkelers to accidently kick with their fins. This reef tends to get a lot of wind in the afternoon, so make sure you start early.

Our next two locations are the best snorkeling sites on the Big Island. Kealakekua Bay the home of the Captain Cook Monument and Honaunau Bay also known as Two Step. Kealakekua Bay is a marine preserve and is heavily protected. There are only a few ways to access the bay. Visitors can rent a kayak and paddle across the bay to the reef. Some really strong swimmers, swim two miles across the bay to snorkel. Experienced hikers will travel 2.5 miles down a lava field to access the bay. Many people often experience some sort of heat exhaustion when the attempt to climb back up the mountain. Lastly, many people choose to come by boat. Not only do people that come by boat get to see the best of the reef, they also are told of the history and significance of this historical location.

Honaunau Bay or Two Step is adjacent to the national historic site Pu’u Honua O’ Honaunau. Visitors can often park next to the beach just steps from their cars. We see more injuries at this snorkel spot than any other location. The location gets the name Two Step because there are two lava ledges that give snorkelers access to the reef. However, entry and exit of the reef comes with some difficulties like large swells, sea urchins, and sharp lava rock. There are a number of tour operators who access this location and explore the rarely seen outer reef at Honaunau.
Planning and Pitfalls
Before you pick any of the wonderful reefs Big Island has to offer, make a plan, then a backup plan. Big Island is BIG, and our beaches are spread apart. You’ll want to plan for changes. Locals usually pack up for everything and hope for the best. Besides your snorkeling gear noted above, a cooler full of ice and cold drinks can make or break a day. Packing snacks is also very handy. Beach chairs, umbrellas, beach towels, and a change of clothes will make you ready for almost anything.
Take your time, be patient, respect the island and its inhabitants and you’ll surely have a wonderful time during your stay. Remember to always travel with aloha. See you at the reef.
